How to Install ESXi 6.0 from Onboard Administrator
In this byte, we will be going through the install of ESXi 6.0 on an HP c-Class BladeSystem.
There are a few different methods to install/upgrade ESXi; namely,
- ESXi Interactive Installer – Boot from ISO, choose install/upgrade
- vSphere Update Manager – Import ISO, create upgrade baseline, remediate
- ESXCLI – Stage ZIP, execute
- Scripted Upgrades – Update/customize upgrade script
Today we will be running the Interactive Installer utilizing the Onboard Administrator of our chassis.
Before we start, ensure you have downloaded the ESXi ISO and copied the ISO to your USB drive.
When ready, plug said USB into the BladeSystem. On the c7000, the USB connection is made on the OA module which is located on the back side of the chassis.
Log into the BladeSystem Onboard Administrator.
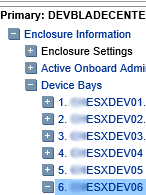
From the OA main screen, navigate to your server under Device Bays.
Select the Virtual Devices Tab.
![]()
Under Connect to Device, select your USB in the drop-down menu.
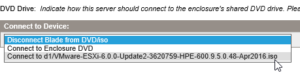
Hit Apply.

You will now see your DVD/USB is connected.
![]()
If the server isn’t off already, reboot your server now to boot from the connected device. Select Momentary Press for a graceful shutdown.

Note: If the server doesn’t boot into the image, you may need to change your boot options for that bay. Change this in the Boot Options tab for the device bay.
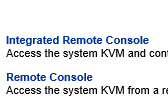
Next, Remote Console to the server. Launch RC from the same Virtual Devices tab or from iLO selection in the left pane.
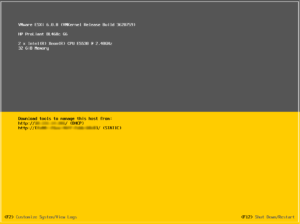
Once in the Remote Console, you will see the ESXi Boot Menu. Press Enter with the ISO selected or wait a few seconds and it will boot automatically.
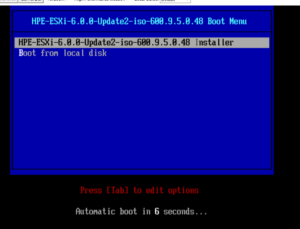
The installer will begin to load.

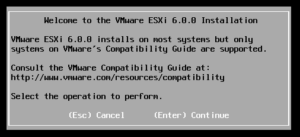
Once the installer has loaded, continue to the installation by hitting Enter.
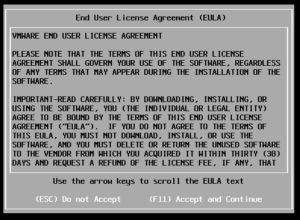
Accept the EULA with F11.
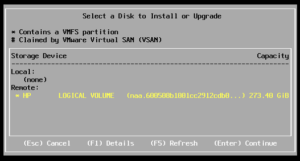
Select the disk where you would like to Install or Upgrade (if you have a previous version in place) ESXi. Press Enter to continue.
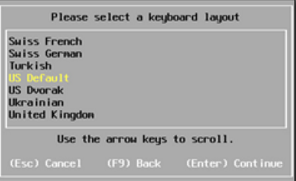
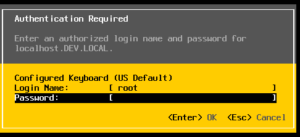
Specify the keyboard layout.
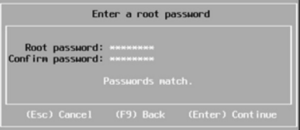
Set the root password.
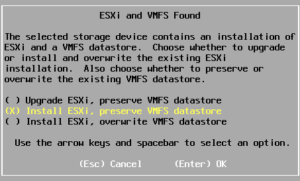
Select the appropriate install option.
- Upgrade ESXi, preserve VMFS datastore – upgrades ESXi and keeps the existing VMFS datastore.
- Install ESXi, preserve VMFS datastore – installs a fresh copy of ESXi and keeps existing VMFS datastore.
- Install ESXi, overwrite VMFS datastore – installs a fresh copy of ESXi and overwrites existing VMFS datastore.
Once the installation is complete, press Enter to reboot the server. Be sure to disconnect your USB before rebooting.
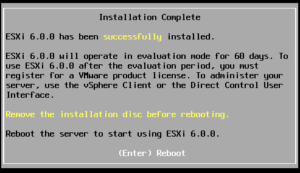
**The disconnect can be done in the same fashion you used to connect the device.

After reboot, you will be brought to the DCUI screen. Congrats ESXi is installed!
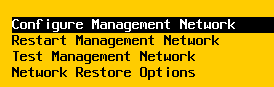
You will most likely want to perform some quick network configuration to get started.
Hit F2 to access the DCUI and enter the root password.
Navigate to the Configure Management Network. From there you can set your IP address, netmask, DNS, etc…