Upgrade Cisco UCS Server Firmware with Host Update Utility
Upgrading server firmware is an integral part of patching your infrastructure. Typically, device firmware is installed prior to upgrading your OS/hypervisor. In this scenario, we will be upgrading Cisco UCS server firmware via the Host Update Utility (HUU). This specific server/host is running VMware ESXi. It is also worth noting, this process is also revelevant on how to upgrade Cisco CIMC.
Before we get into the actual server firmware patching, let’s talk about drivers vs firmware as these two may get confused. Driver software is installed on the OS (e.g. ESXi), while firmware is a lower-level code that is installed on host hardware devices (UCS Servers/Blades). It is important to ensure firmware is compatible with ESXi versions and drivers prior to upgrading the server firmware. Both Cisco and VMware have compatibility guides for reference.
Cisco Hardware and Software Compatibility
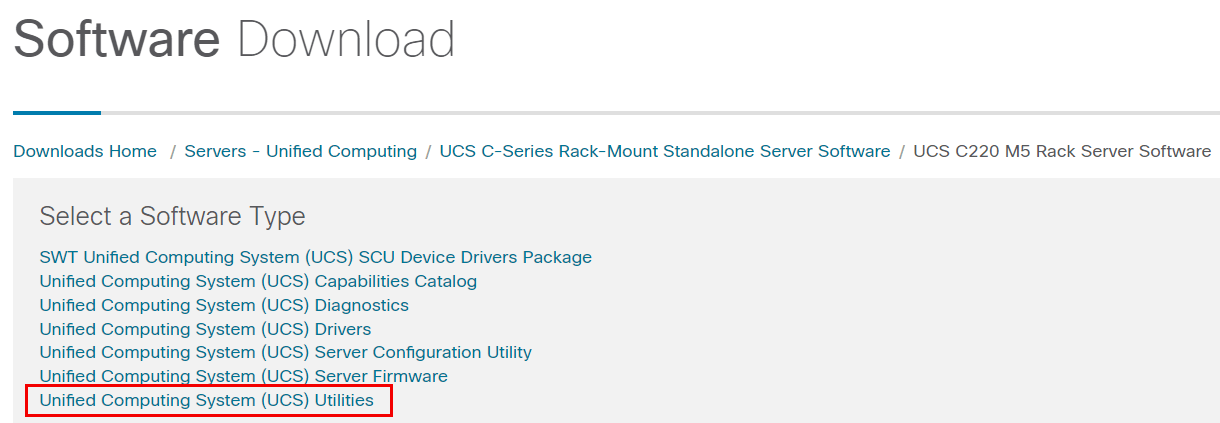
After verifying compatibility, we will start by downloading the Cisco Host Update Utility. Navigate to https://software.cisco.com/download/home and locate your server. In our case, it is a UCS C220 Rack Server.

Under Software Type, select Unified Computing System (UCS) Utilities.
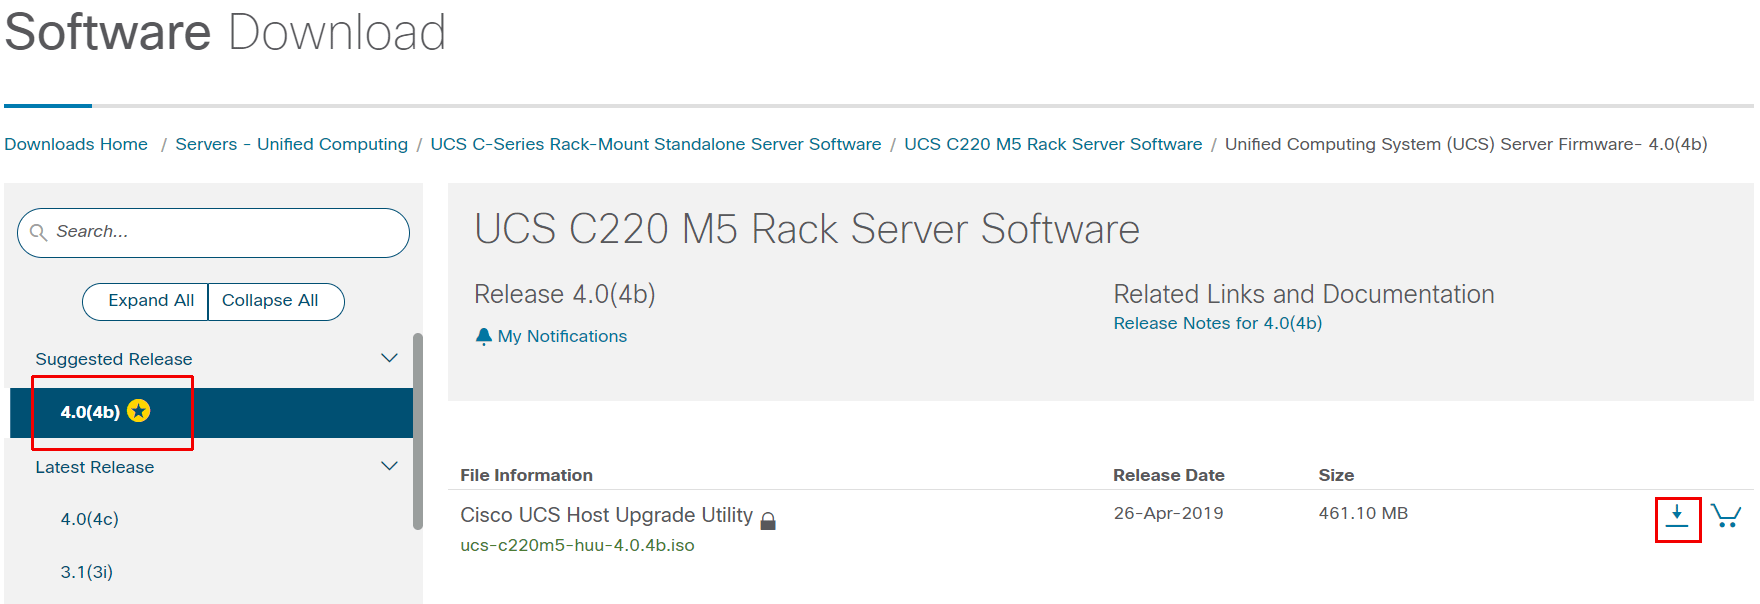
Locate the pertinent Host Upgrade Utility release and click the download arrow.
Once the Host Upgrade Utility is downloaded, we will prep to upgrade our server by migrating virtual machines off of the host. Since this is a VMware environment, we’ll enter the host into Maintenance Mode.

After the virtual machines are migrated (or shutdown), log into CIMC of your sever. From the Chassis Summary tab, click Launch KVM and select Java based KVM or HTML based KVM.

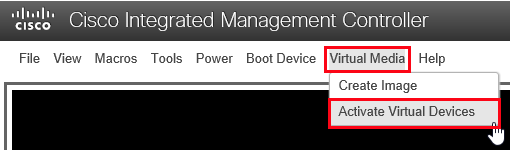
Next, we will attach the Host Update Utility ISO. To do so, select Virtual Media and click Activate Virtual Devices.
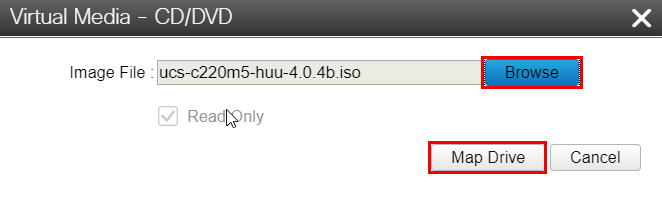
From Virtual Media, click Map CD/DVD.

Browse to the downloaded Host Update Utility ISO and select Map Drive.
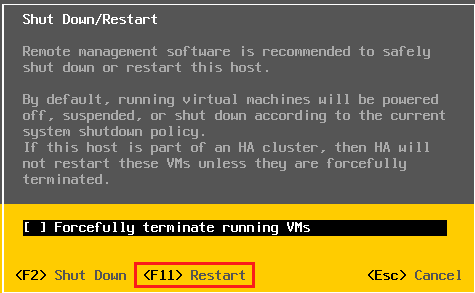
After the drive has been mapped, Restart the host.
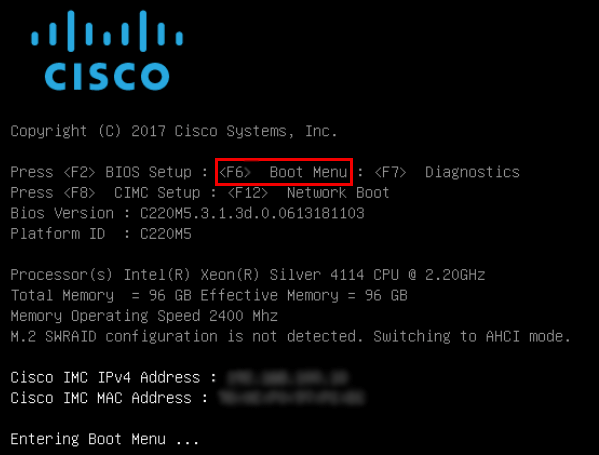
As the server starts up, hit F6 to enter the Boot Menu.
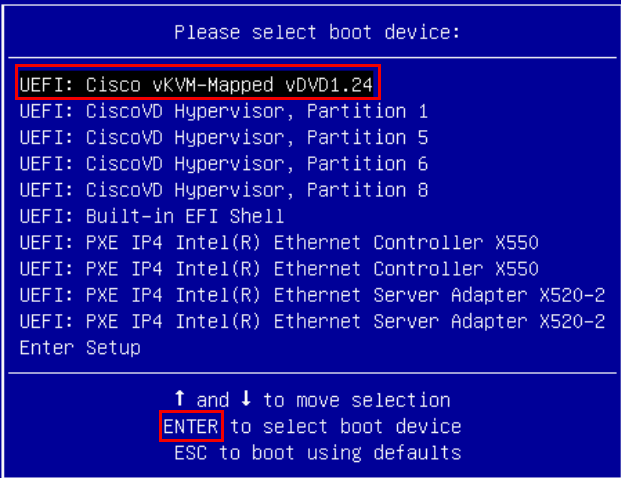
In the boot menu, select Cisco vKVM-Mapped vDVD and press Enter.
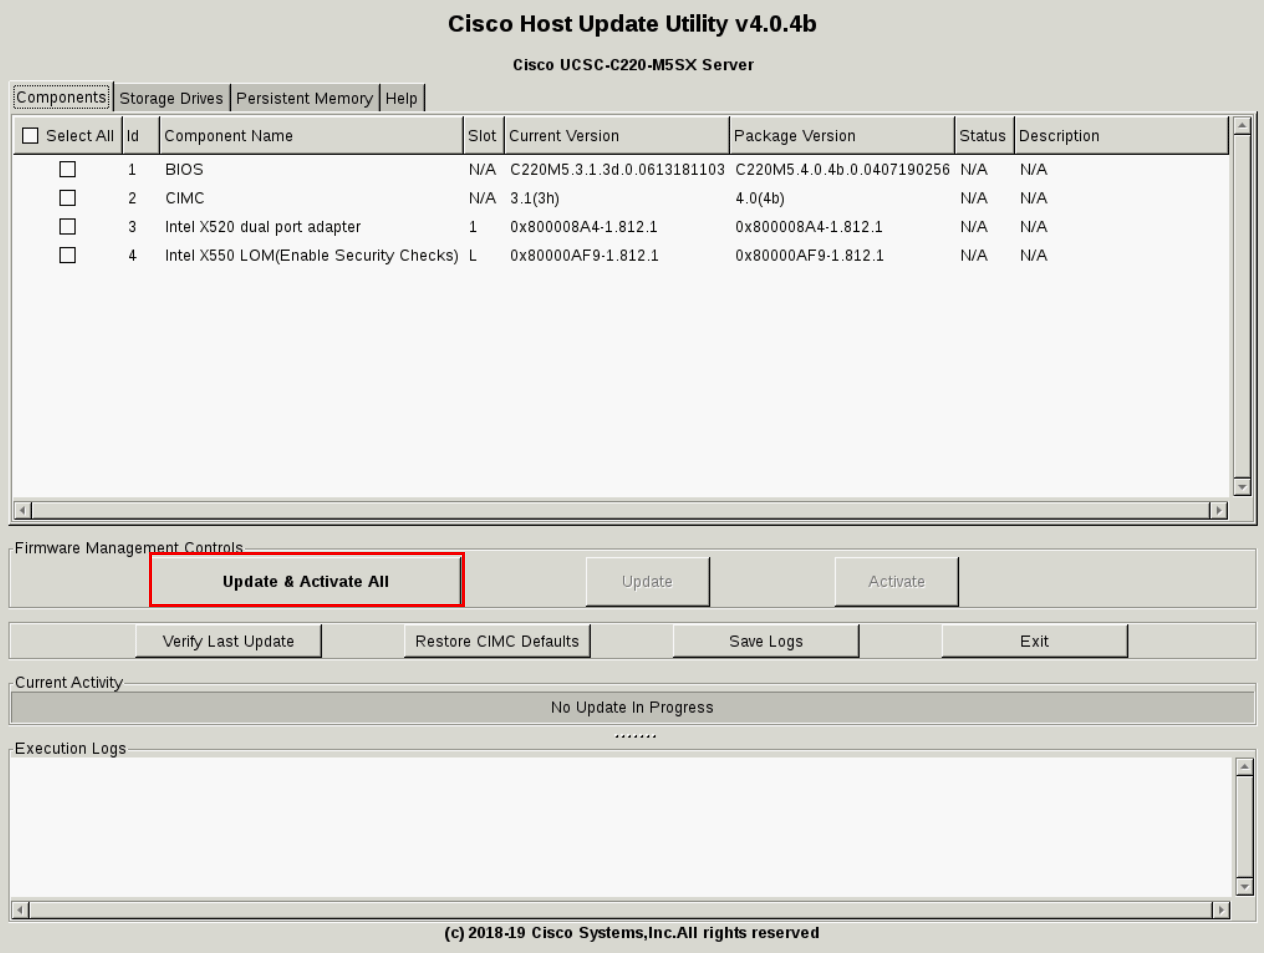
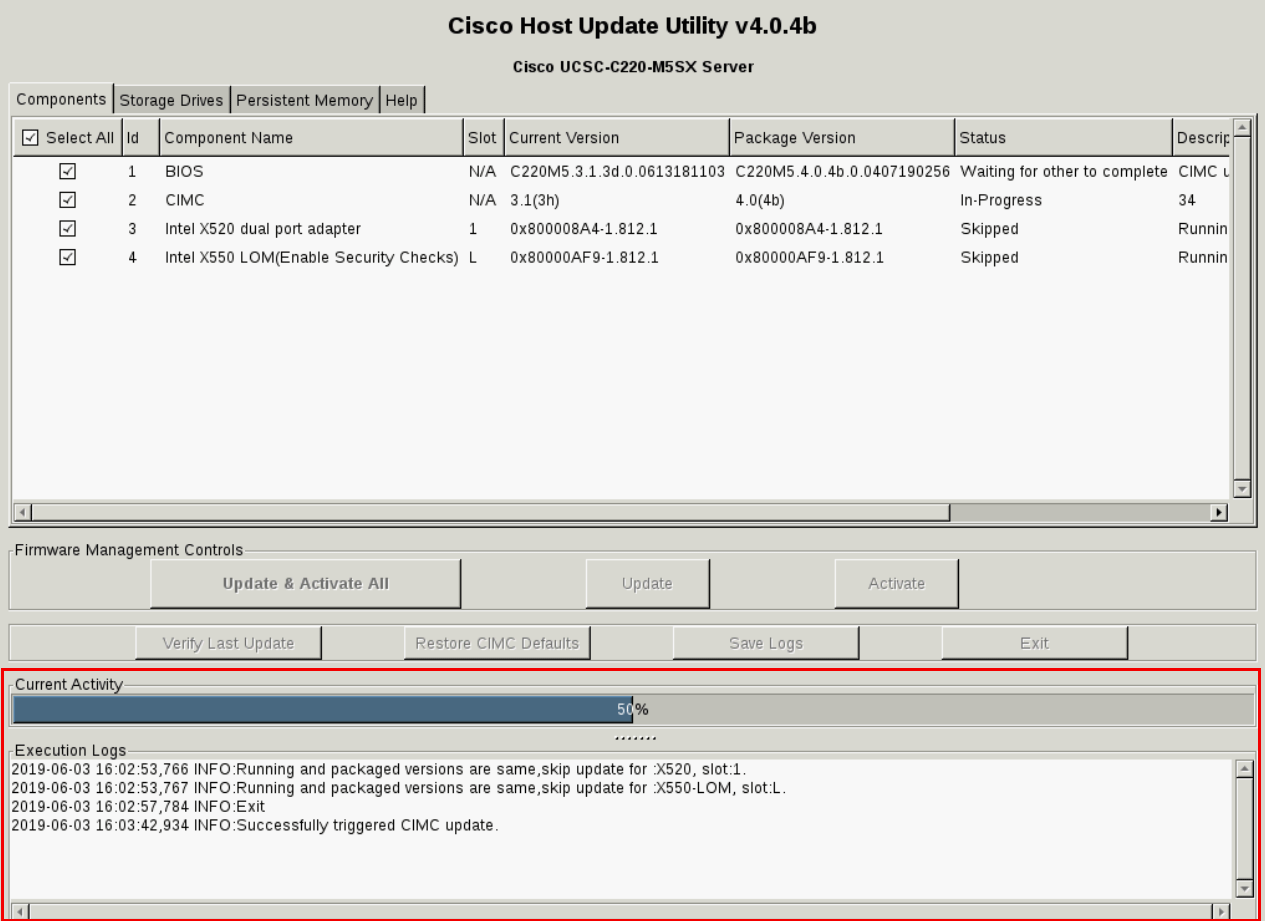
After accepting the EULA, you will be presented with the Host Update Utility interface. From here, you can view the current component versions and the available update packages. In our scenario, we are going to update all components, including the BIOS and CIMC. To do, so click the Update and Activate All button.
Next, you will be presented with a confirmation screen indicating this update will result in a system reboot. Click Ok to continue.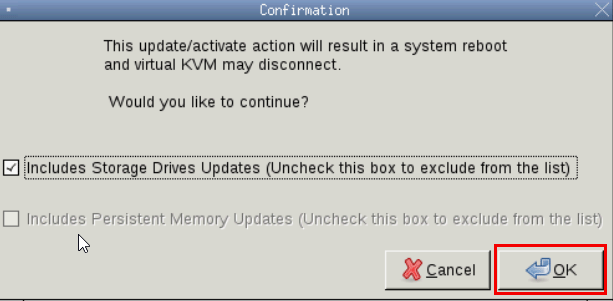
The selected components will begin updating. View progress and execution logs in the bottom pane.
After the updates complete, reboot the server. Once the server has successfully rebooted, navigate back to vCenter and remove the host from maintenance mode.

Related Posts