Downgrade VMware VM Hardware Version
A few weeks back, we discussed how to downgrade ESXi versions. These downgrades or rollbacks will often time bring compatibility issues into play. One such issue is the compatibility between the ESXi version and virtual machine hardware version. If a virtual machine with a higher version of hardware resides on an unsupported (lower) ESXi version, you will receive an error and not be able to start the machine. The error will state – This virtual machine uses hardware version x, which is no longer supported. Upgrade is recommended.
![]()
To address such issues, VMware supports three ways of downgrading virtual machine hardware.
- Revert to a pre-upgrade snapshot.
- Convert the virtual machine with VMware vCenter Converter Standalone and specify the appropriate destination hardware version.
- Create a new VM with a compatible hardware version and attach existing disks.
In this post, we will perform the latter; specifically, downgrading virtual machine hardware 13 to 11.
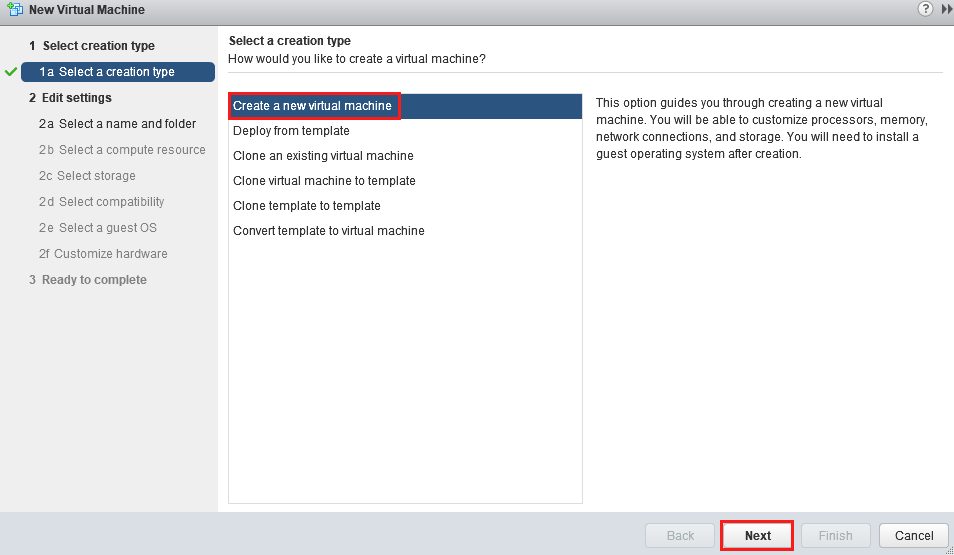
To begin the process, kick off the creation of a New Virtual Machine from vCenter.

Specify Create a new virtual machine for the creation type.
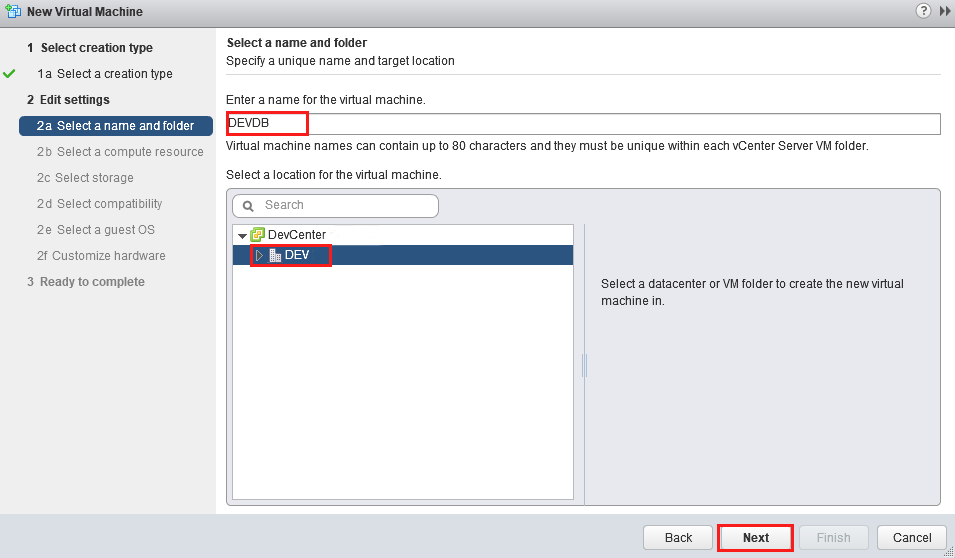
Enter a unique virtual machine name and specify the target location for the virtual machine. This name needs to be different than the old machine. For clarity, this name is only how it appears in inventory. It can be renamed later for conformity.
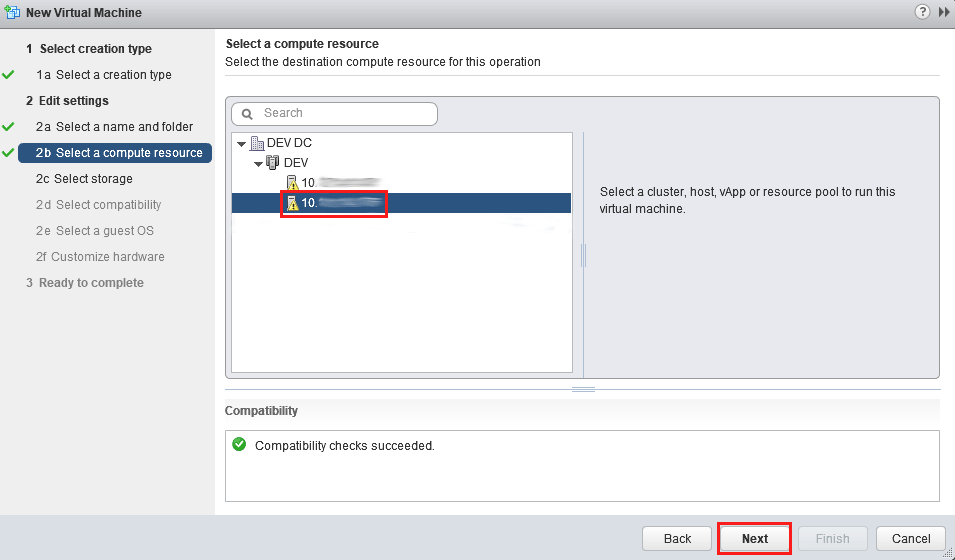
Select the compute resource to run the virtual machine.
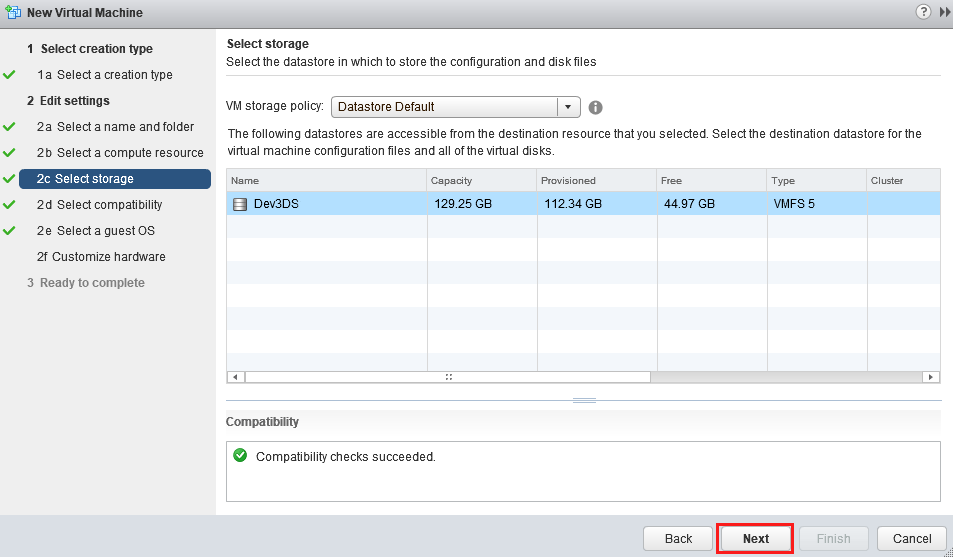
Select the datastore where the virtual machine’s configuration and disk files will reside.
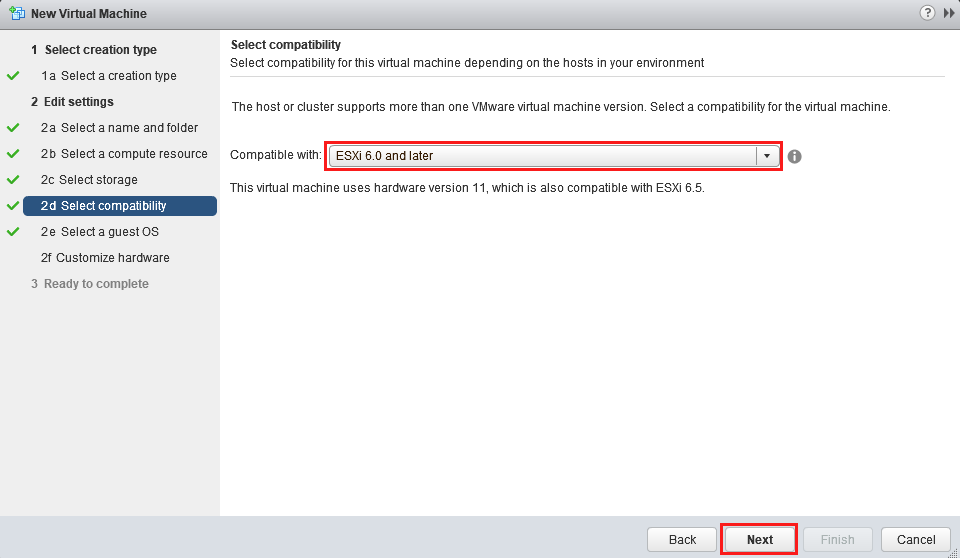
In this step, we will specify the compatibility level for the virtual machine. In our case, we chose ESXi 6.0 and later as that utilizes hardware version 11.
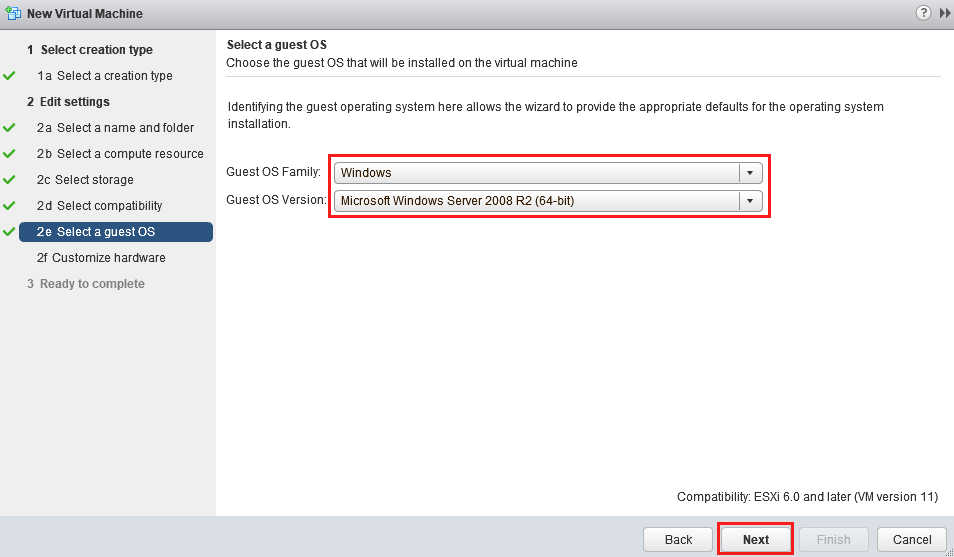
Select the guest OS Family and Guest OS Version.
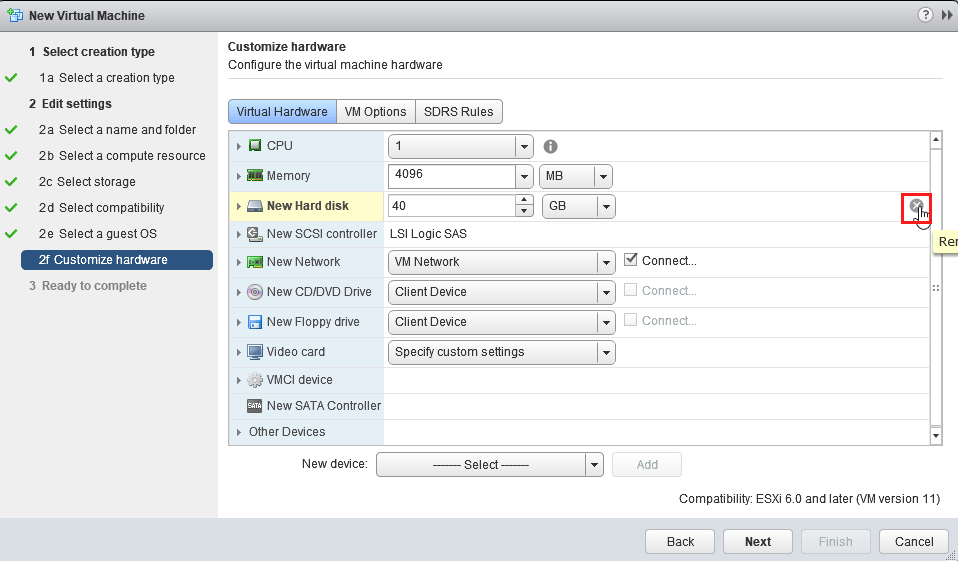
Now, we will start the process of attaching the existing disks to the new machine. First, remove the New Hard disk. This disk is added by default; however, we want to add our own disks from the old machine, so that disk is not needed.
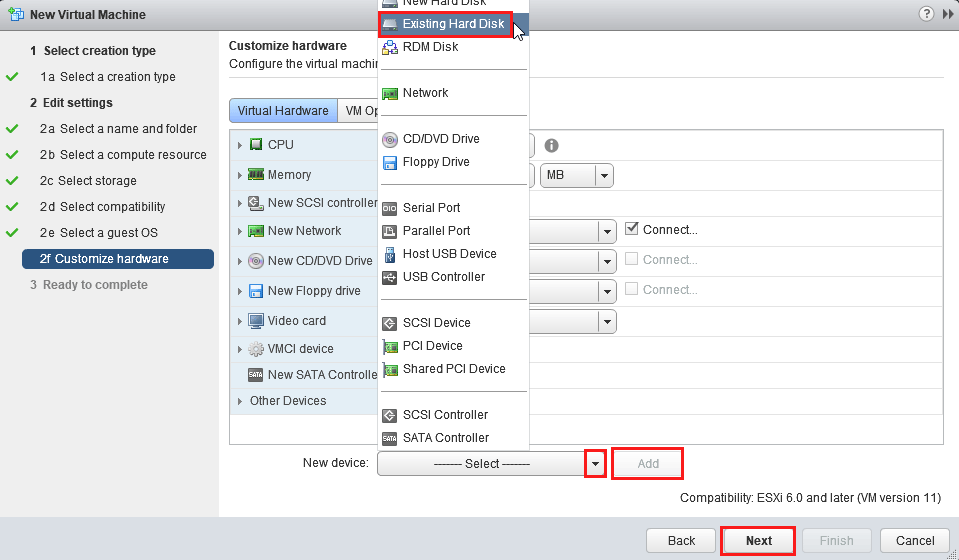
Next, hit the New Device arrow and select Existing Hard Disk. Finally, click Add.
After selecting Add, you will be prompted to select the existing vmdk. Select the appropriate vmdk file and press OK. If you have multiple disks to add, repeat the previous step.

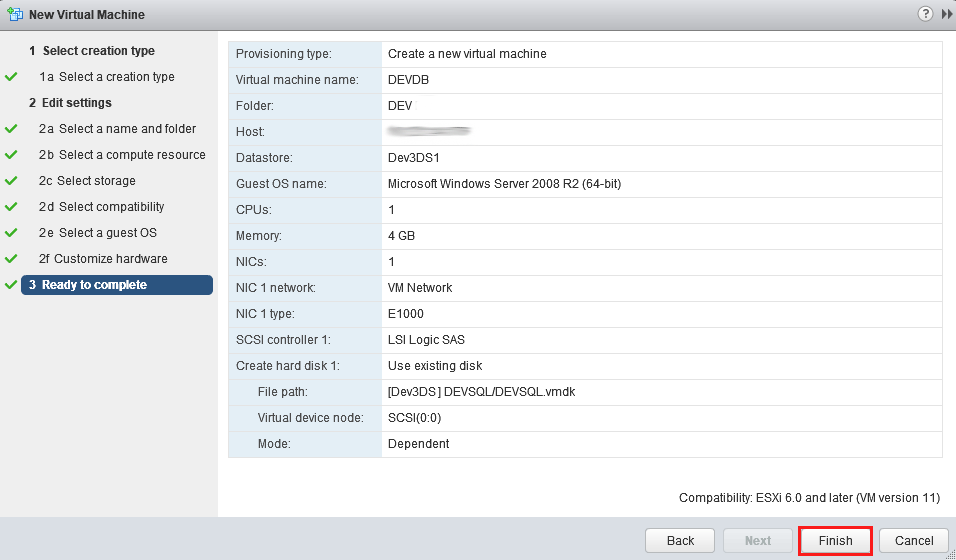
Finally, review the virtual machine settings you select. To create the new machine, select Finish.
The new machine with existing disks will now be created. After creation, boot the machine and ensure the machine has been created appropriately.
VMware KB – Downgrade VM Hardware Version
VMware Virtual Machine Compatibility Reference
Related Posts