Add Secondary DNS Server to SailPoint Virtual Appliance
Virtual Appliances are critical components to the SailPoint IdentityNow infrastructure. Initially, when the virtual appliances are configured, the network information is set; however, if you only configured a single DNS server, you may want to add a secondary DNS server to mitigate issues in the event your primary DNS server is unavailable. To do so:
SSH to the Virtual Appliance(s) and login using the sailpoint account.
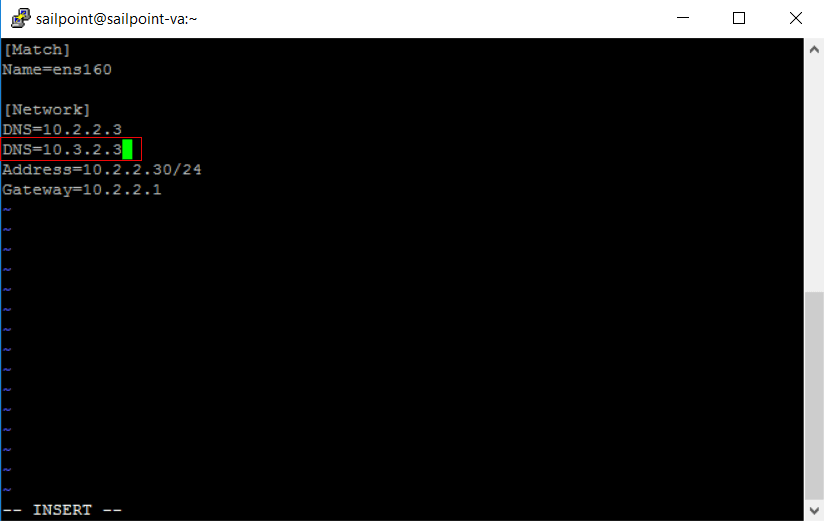
Edit the network file with sudoedit /etc/systemd/network/static.network
![]()
To start entering text into the file, change to insert mode. Type i to enter Insert mode.
Next, add the additional DNS entry in the format DNS=x.x.x.x

Once finished, hit the escape <ESC> key to enter back into normal mode.
To save the static.network file and exit, type :wq!
- To exit without saving changes to file, enter :q!
To apply the configuration, restart the systemd-networkd with sudo systemctl restart systemd-networkd command.
![]()
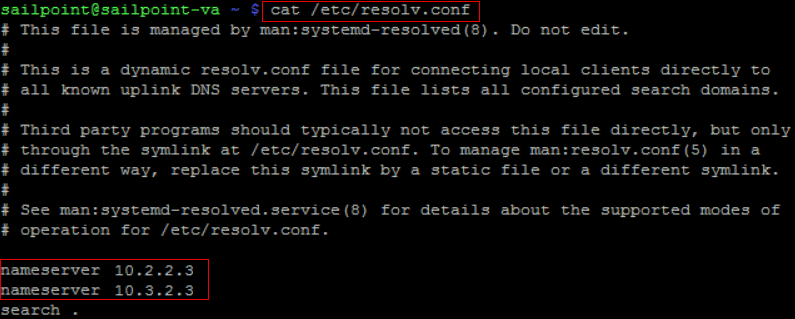
Verify DNS configuration by looking at the contents (nameserver) of the resolv.conf with cat /etc/resolv.conf. Don’t edit this file. This file is managed by system-resolved which obtains DNS addresses from system-networkd via the static configuration.

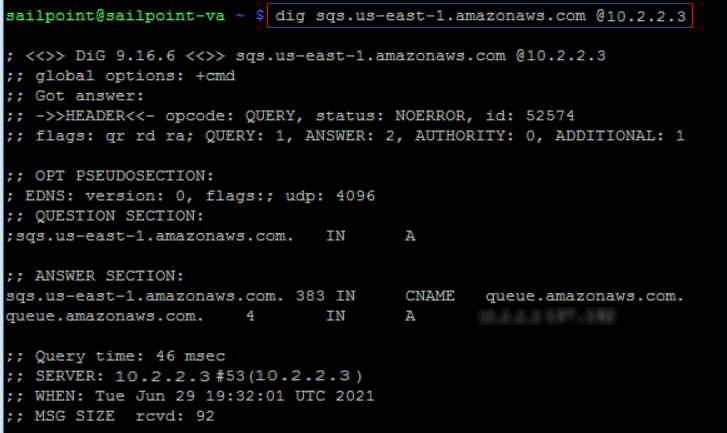
Lastly, you can test the DNS server using Dig. For example, dig sqs.us-east-1.amazonaws.com @<dns server ip>

If the DNS server cannot be reached, you will receive a status of: connection timed out; no servers could be reached.
